Meticulous surface preparation is absolutely essential for restoration success. Neglecting this fundamental step can result in premature failure and wasted effort. Proper prep ensures restorative materials adhere correctly, maximizing durability and minimizing future repair needs. This involves carefully evaluating the existing surface, identifying any damage or imperfections, and addressing them before restoration begins.
Thorough cleaning to remove loose debris, contaminants, and old coatings forms a crucial part of surface preparation. This creates a clean, stable foundation for restorative materials, leading to a robust final product. Inadequate cleaning can undermine the entire restoration process.
Assessing Existing Conditions
Before starting any restoration project, conduct a comprehensive assessment of the surface's current condition. This evaluation should identify all existing damage, imperfections, or deterioration. Detailed documentation of these issues is indispensable for effective restoration planning.
Check for structural integrity, moisture content, and potential underlying problems like rot or pests. Photographic documentation and written reports help formulate a thorough restoration plan, enabling informed decision-making and accurate cost estimation.
Cleaning and De-contamination
Thorough cleaning and decontamination represent critical preparation steps. This process removes loose debris, dust, dirt, and other contaminants from the restoration surface. This ensures proper material adhesion and prevents future issues. It often involves specialized cleaning solutions and techniques to eliminate existing coatings or residue.
Exercise caution when selecting cleaning agents to avoid damaging the underlying surface. Appropriate agent selection and application are paramount for successful restoration, creating a stable foundation for subsequent work.
Repairing Damage
Identifying and repairing existing damage is essential for successful restoration. Cracks, holes, and other imperfections must be addressed before restoration begins. This ensures long-lasting results and minimizes future problems. Techniques may include patching, filling, or other repairs tailored to the specific damage type.
Repair methods vary depending on material and damage extent. Attention to detail is crucial at this stage, as poorly executed repairs can compromise final results. Quality repairs create a solid foundation for the restoration process.
Removing Loose Materials
Eliminating loose or deteriorated materials is crucial for creating a stable restoration base. This involves scraping, brushing, or other techniques to remove unstable paint, plaster, or other deteriorating substances. The goal is to leave only sound, stable surfaces for subsequent restoration steps.
Surface Preparation for Specific Materials
Different materials demand specific preparation techniques. Concrete may require grinding and cleaning, while wood might need sanding and sealing. Understanding material characteristics and limitations is vital for successful restoration. This knowledge is indispensable for achieving optimal results. Each material has unique requirements; ignoring these can lead to poor adhesion and early failure.
Consider factors like existing paint type or coatings when preparing surfaces. The chosen technique should align with the material being restored and the desired outcome.
Priming and Sealing
Priming and sealing prepared surfaces is essential for optimal restorative material adhesion. This step creates a uniform surface and prevents moisture penetration. A properly primed and sealed surface also protects against environmental factors. Selecting appropriate primers and sealants is crucial for durable, long-lasting restoration.
The choice of primer and sealant depends on the restorative material used. Proper application ensures a strong bond between material and surface, minimizing future problems.
Applying the Car Plastic Restorer
Understanding the Product
Car plastic restorers are specialized cleaners and polishes designed to rejuvenate faded, scratched, or discolored vehicle trim. They work by removing surface contaminants, restoring original color, and often adding a protective layer to prevent future damage. Understanding your chosen restorer's specific formulation and intended use is vital for optimal results.
Products vary in application, so always consult manufacturer instructions. Some products work better with certain plastic types, so selecting the right restorer for your vehicle's trim is crucial for achieving desired outcomes.
Preparing the Surface
Before applying any restorer, thoroughly clean the plastic trim area. Use mild soap and water or a dedicated car wash solution to remove dirt, grime, and contaminants. Ensure the area is completely dry before applying the restorer.
Removing loose debris like dirt or dust is essential before application. This ensures proper product adhesion and effectiveness.
Choosing the Right Restorer
Select your plastic restorer based on your car trim's specific condition. Minor fading might only need a simple polish, while significant damage may require a more intensive restorative product. Consider whether the plastic is hard or soft when making your selection.
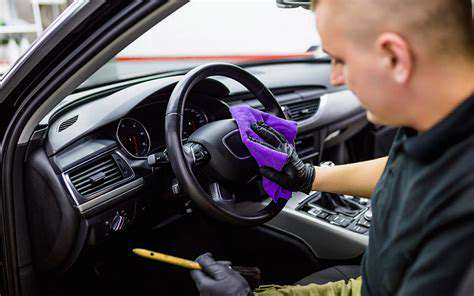
Applying the Restorer
Follow manufacturer instructions carefully. Typically, apply a small amount of restorer to a microfiber cloth or applicator pad. Work in small sections, gently buffing the product into the plastic trim. Avoid excessive pressure that could damage the plastic.
Apply the restorer evenly to prevent streaks or uneven results. A light touch and systematic application are key for consistent finishes.
Drying and Buffing
After application, allow the plastic trim to dry completely. This lets the product fully penetrate and bond with the surface. Once dry, use a clean microfiber cloth to buff the area to a shine, removing any remaining residue and revealing the restored color.
Inspecting and Refining Results
After complete drying, carefully inspect the treated area for any remaining imperfections. If needed, reapply a small amount of restorer to address spots requiring additional attention. Check for consistency in the finish.
Look for streaks or uneven areas and apply more restorer as necessary, always following manufacturer reapplication guidelines and avoiding over-application. Once satisfied with results, move to the next trim area.
Maintaining the Restoration
To preserve your plastic trim's restored shine and color, avoid harsh chemicals or abrasive cleaners on treated areas. Regular washing with mild car wash solutions and occasional protectant applications will extend the restoration's lifespan.
Keeping your vehicle clean and using appropriate products prevents future damage to restored areas, ensuring your restoration investment lasts.